4 Tips to Prepare for Holiday Orders

holidays

The holiday shopping season is here, whether we’re ready or not! Online retailers of all sizes are busy preparing for the surge of expected holiday orders. Is your embroidery business ready?

It can be difficult to predict what your holiday workload will be like but you can make sure you’re prepared for anything by stocking up on supplies, working ahead to keep yourself from falling behind, and looking back at the growth of your embroidery or monogramming business to estimate what your holiday sales might be like.

Start by looking back.

Take a look at the past year. How have prime shopping holidays affected your workload

  • Did you experience a boost in sales last holiday season?
  • How has your business grown since last year?
  • Use these numbers to estimate how much your holiday sales might be boosted.

Pay attention to peak holiday shopping dates, such as Black Friday, Small Business Saturday, and Cyber Monday. The weeks leading up to Christmas are also popular with last-minute shoppers.

Work ahead as much as possible.

“Made to order” isn’t always the best plan when you’re expecting a big surge in orders. Stock up on popular products and holiday-themed items so you can get your orders shipped as soon as possible. The sooner one order is finished, the sooner you can get to the next!

If you offer custom work that can’t be made ahead of time, prepare as much as you can so that everything is ready to be customized when an order comes in.

Keep extra supplies on hand.

Nothing cuts into your workflow like having to stop to go buy more supplies. Stock up on extra embroidery thread, extra needles, stabilizers, and anything else you’ll need to create your most popular products. Remember, it’s better to be over-prepared than unprepared.

Don’t forget about shipping and packaging supplies! Keep extra boxes, shipping labels, tape, and other supplies on hand so you can fill your orders as soon as possible.

Stick to your deadlines.

Holiday shoppers are most likely looking for gifts for their loved ones or for the perfect piece of embroidery to fit their holiday décor. Either way, your customers want to know they’ll be able to get their orders on time. Decide on cutoff dates for holiday orders and alert your customers to these deadlines. If you can, figure out the last possible day someone could order and still be guaranteed to receive their order on time. Don’t forget to include extra time for production!


20 Instagram Marketing Tips to Grow Your Embroidery Business

instagram

Are you marketing your embroidery business on Instagram? With more than 200 million active users each month, Instagram is a growing platform that’s perfect for showcasing your products. Marketers find that users engage on Instagram 15x more than they do on Facebook, which means a much higher potential for your store to get noticed.

If you’ve been wondering how to get more Instagram followers or how to get more embroidery sales online, this list is for you! We’ve put together some great Instagram marketing tips that will have you posting like a pro in no time.

Instagram Marketing Tips

Create a business account rather than using your personal Instagram profile. Try to choose a username that matches your business name or that is easy to identify with your brand.

-Make sure your profile is complete by adding a profile picture and link to your business page or website. Don’t forget a fun bio to tell people about your business!

-Use a link shortening tools like Bitly that allow you to track and monitor link clicks. Remember that links can’t be clicked from posts, so update your bio link.

-Use hashtags (#) to help expand the reach of your posts. When typing in hashtags, you’ll be able to get a glimpse of how popular they are, but you can also browse other embroidery-based accounts for ideas.

-Create your own branded hashtag so your customers can spread the word about your business! Make it trendy and easy to remember.

-Take high-quality images. It’s all about the visuals on Instagram, so make sure your pictures stand out! Instagram images use a square format. While it is flexible to rectangular images, it still only shows a square when you’re looking at your profile. So it’s best to stick with the square format more often than not.

-Create a posting schedule and stick to it. There’s no golden rule to posting on Instagram, but you’ll learn over time what times and frequencies work best with your followers.

-Post image galleries and videos, not just images. Different formats encourage engagement and might get noticed more than a standard picture post.

-Include behind-the-scenes images to give customers an inside look at your process and how your products are made.

-Share the love! Follow other embroidery accounts and share their work. They might return the favor!

-Pay attention to trending hashtags by checking out the ‘Explore’ section on your Instagram app. You might find hashtags you can use in your posts to help get your account noticed.

-Host giveaways on your account! Encourage followers to tag their friends in order to win free stuff. It’s a great way to spread the word about your business. Make sure you follow Instagram’s rules regarding contests or giveaways on the platform.

-Spread the word about sales and other promotions in your shop.

-Show off what’s new! Take pictures of new products and “product previews” to get people excited.

-Interact with your followers. Respond to comments and give shoutouts by tagging customers in your posts. This will encourage others to interact with your account.

-Tell people what to do. Include a “call to action” with every post, especially if you’re showcasing a product or sale.

-Create shareable content. Post inspirational quotes, pictures of cute puppies, and more that people will want to share with their friends.

-Be creative. Experiment with Instagram filters, take photos from different angles, and have fun with your posts!

-Show your products in action. A display image is nice, but your customers want to know what your embroidery is going to look like in their home or when they’re wearing it. Don’t limit yourself to sharing photos, include looping videos of your products too!

-Find out what works for you! No two Instagram accounts are ever alike. You never know what’s going to get your followers excited about your account, so don’t be afraid to try something new now and then!


Embroidery Business Tips: How to Price Your Products

We all take different things into consideration before making a purchase, but for most of us there’s one common factor: price. As an embroidery business owner, you want to price your products in a way that fits the value your customers see for your products, but you also want to maintain a profit so you can stay in business. Every product has a pricing “sweet spot” where value and profits meet.

There are many things to consider when deciding how to price your embroidery products. We recommend trying a “top down” approach to pricing embroidery products, which means starting by calculating your upfront costs and overhead. This includes the cost of materials, shipping, outside costs such as marketing, and of course your time spent.

shipping

Cost of Materials

When pricing embroidery products to sell, start by calculating the cost of your materials. Some materials will be easy, such as a garment that will only be used for a single project. Other materials, such as embroidery thread, are purchased in bulk but will be used for many different products.

For these items, give your best estimate to figure out the average number of projects you can finish with that material, and use that to calculate the cost per project.

For example, say you can embroider 100 shirts from 1 cone of thread that costs $8.
$8 ÷ 100 = $0.08 per project. If you use an average of 5 colors per project, your thread costs per project is about $0.40, on average. Do this calculation for every material used to complete a project and add the costs together. This is your base cost.

Cost of Shipping

If you charge shipping separately, try using a flat-rate based on the average cost of shipping for orders. If your orders vary in quantity and weight, it may be more cost effective to create a small series of scaled shipping costs based on what’s sold. Beyond the cost of shipping itself, don’t forget to include the cost of packaging materials and any add-ons included with an order, such as coupons, business cards, etc.

You can save on shipping costs by using flat rate packaging when possible. It’s also a good idea to invest in a small scale you can use to weigh your items and then you can pre-purchase packing slips.

Overhead Costs

You’re making investments in your embroidery business all the time, so don’t forget to factor those costs into your product pricing. Think about everything that goes into making your business possible. These are also known as “overhead” costs.

  • Marketing
  • Website hosting
  • Photography equipment
  • Embroidery machine maintenance
  • Space for your business (rent, utilities, etc.)
  • Vendor fees at craft fairs
  • Listing fees on sites like Etsy or Ebay

your time

Your Time

So many of us forget to value our time! Always keep track of the time spent on a project, and include the cost of labor in your embroidery product prices. Products that take a higher skill level than others should be adjusted accordingly for price.


Tips for Starting an Embroidery Business out of Your Home

home emb

Are you thinking about starting a home embroidery business? Working from home has many pros and cons. The flexibility and freedom are a trade-off for distractions and interruptions. When setting up your home embroidery business, follow these tips to stay on track and make the most out of working from home.

Select your home studio space.

Try to choose a designated workspace that’s separate from your home’s living spaces. This will help you stay focused during the workday. Choose a space that’s quiet and well lit, and large enough to fit all of your supplies, including your embroidery machine. Even if you can’t reserve an entire room as your home studio, it’s a good idea to make a certain corner or desk “for work only.”

Tip: Organize all of the supplies and materials you need for your business in labeled bins to keep track of inventory levels and save time!

Stay away from distractions.

It’s not always easy to stay focused when you’re working from home, so do your best to minimize distractions. Clear away any clutter and close the door to block out any noise. If you don’t need your cell phone for work, set the ringer to silent or put it away completely. Create a phone message that states you are at the machine and will return the call at the next opportunity.

Tip: If you’re having a hard time getting into “work mode” during the day, try dressing in more professional attire to get yourself into the right mindset. It’s hard to work when you’re in pajamas!

Organize your home embroidery studio.

Increase your productivity by giving every part of your business a designated place in your home embroidery studio. Keep supplies well organized, and have a separate area for packaging and shipping. Decide where completed orders will go so you never lose anything.

Tip: Organize your invoices and other paperwork from the start, before you get buried! Decide where all your important documents will be stored, and keep track of monthly costs and profits in a spreadsheet.

Set “office hours” for yourself.

The flexible hours when you’re working from home can be both a blessing and a curse. Many of us get caught up in the freedom of not “having” to work set hours and end up working extra late nights in order to catch up! It’s fine to give yourself some flexibility, but try giving yourself set hours to work during the day so you don’t fall behind.

Tip: If business is slow and you have some free time during your working hours, that’s a great time to work on marketing your business!


18 Jan How to Get Return Customers and Grow Your Business

repeat

You put a lot of effort into growing your embroidery business. Whether you’re working on setting up your business online, creating the perfect product listings, or marketing your business, there are plenty of ways to attract new customers. But you might be forgetting about your most important customer base–the ones you already have!

Studies show that repeat customers account for up to 40% of a store’s revenue.

Here are a few ways to show your appreciation for those customers you worked so hard to get and encourage them to shop again!

Start by saying “Thank you.”

Showing your appreciation can go a long way! Too many companies place their sole focus on getting to that “next” customer while forgetting to care for the customers they already have. Include a thank you message following their order and consider adding a note during shipping. Handwritten notes show you’re personally involved in their order and will help you stand out from your competitors!

Keep your customers in the loop.

Even though they love your store, your customer won’t always be thinking about you. Stay on their minds by keeping in touch. Consider building a mailing list and having a monthly or quarterly email newsletter that lets your customers know what’s happening with your embroidery business. Maintain an active online presence and announce sales, new items, and giveaways on your social media pages.

Offer incentives to shop.

Referral rewards and discounts for return shoppers are a great way to show your customers you want them to keep coming back. Add cards with discount codes to your packages and offer perks such as free shipping on larger orders. Recommend gift certificates for your customers who are buying linens for wedding gifts and other special occasions. Gift certificates are also perfect for baby showers when you aren’t sure of the new baby’s gender or name!

Engage!

Shoppers love building connections with the brands they buy from. Whether you’re telling the story behind a product you’re offering or showing a behind-the-scenes video of your workspace, it never hurts to take the time to engage with your customers. When posting on Instagram or Facebook, ask questions and interact with your followers, and remember to answer any questions in a timely manner. Engaging is also a great way to get feedback from your customers!

Let’s recap! Here are some of our top tips for growing your embroidery business:

  • Include a thank-you note when delivering orders to show your appreciation.
  • Create a monthly email newsletter to let your customers know what’s new.
  • Offer discounts and perks for shopping with your store and for referrals.
  • Build connections with your customers via social media.


Patch It Up! Your Guide to Creating Stylin’ Machine Embroidery Patches

Patches, they’re everywhere!

You’ve seen them on jackets, jeans, shirts, backpacks, even sneakers…

The cute embroidered accessories from your youth are making a comeback in 2017, and they’re not just for girl scouts! Popular retailers like Urban Outfitters and Forever21 are pushing patches into mainstream fashion.

As an embroiderer, you want to get in on the fad! Whether your stylish niece wants a custom patch, or you just want to deck out your favorite shoulder bag, it’s time you learned to make your own patches!

patch--banner

How to create an embroidery patch on your commercial embroidery machine

The tools you’ll need:

A digitized patch design: Make sure your design has a reasonable level of detail that will translate well when it is scaled down to patch size.

Sharp needle: The high thread count of most patches means a worn down needle could cause damage. It’s best to start fresh with a brand new sharp needle.

The fabric of your choice: Since you will be using a heavy satin stitch for the outline of your patch, we recommend a sturdy fabric like cotton or canvas.

Water soluble stabilizer: These stabilizers dissolve when rinsed, leaving your patch with a clean finish after your hard work is complete.

  1. Choose your digitized patch design and load it into your embroidery machine.
  2. Hoop a piece of heavy water-soluble film or water-soluble mesh in a suitable hoop size. Water-soluble mesh allows you to stitch multiple patches in a single hooping, while the film type perforates, limiting you to a single patch per hooping.
  3. Begin by embroidering a placement line of your patch design directly onto the water-soluble stabilizer.
  4. Place your patch fabric over the placement line and stitch the tack-down line.
  5. Edge the outside of your fabric using a zigzag stitch to connect your patch fabric to the water-soluble stabilizer.
  6. Cut around the fabric with scissors, keeping close to the tack down stitching.
  7. Stitch the elements of the patch, finishing with a satin border, using a density of about 3 points.
  8. If using film type stabilizer, just punch the patch put and it is complete. If using water-soluble mesh, submerge the patch in water or moisten around the edges using a moistened cotton swab.

patch

There you have it! Once fully dry, you can attach your patches with adhesive or sew them onto a garment for a fun custom twist on your favorite clothes.


6 Winter Embroidery Accessories to Add to Your Product Listings

socks

Socks

Let your customers make a stylish statement without sacrificing warmth. Add monograms, borders, or even patches to knee-high socks and offer the designs in a variety of colors and sizes.

Shoes

Whether you’re going for boots or flats, embroidery with dark colors or a wintery motif are a great statement piece. If you offer custom embroidery work, shoes are a great item to add to your list.

Gloves

Gloves are a must-have winter accessory, but they don’t have to be boring. Leather, knitted, and cloth gloves all offer space for a simple design or even a monogram. Be sure to stock up–everyone will want a pair!

Hats

Berets, knitted beanies, and ear covers will look even better with a bit of embroidery around the edges. Pair with matching designs on gloves, scarves, or shoes to make the perfect winter accessory set to sell!

Patches

Embroidered patches have made a comeback in fashion world and can be used to add a touch of glam to bags, hats, jackets, and more. Be sure to showcase images of your embroidered patches on different types of clothing and accessories to give your customers ideas.

Tips for Selling Embroidery Accessories:

  • Your customers love having options. Offer the same design in a variety of colors.
  • If you’ve sold items such as monogrammed boots before, look at the most popular sizes and use the data to determine which sizes to stock this winter.
  • Can your customers see themselves wearing your products? In addition to your normal product photos, include images of your embroidery accessories being worn.

Why Does My Embroidery Business Need to be Scalable?

What Does it Mean to Have a Scalable Business?
Scalability is a common term in the business world, but what does it mean for a small home-based business? A business is considered scalable when it has the ability to easily adapt to business growth.

Small businesses need to be scalable because they have the biggest potential for growth.

Too often, small businesses that experience sudden growth go through “growing pains” as they struggle to make their existing employees, processes, and equipment function beyond their normal capacity. Scalability in a business means the flexibility to function despite the ebb and flow of a business experiencing growth.

three-machines

THE IMPORTANCE OF A SCALABLE BUSINESS:

Meet your customer’s demands

Unless your business model includes ongoing customers with repeat orders, chances are your workload will fluctuate throughout the year, with peak sales seasons as well as low points. If your embroidery business is scalable, you’ll be able to function at any time, whether you’re processing 10 orders or 100.

Stay competitive

Having a business with the flexibility to scale up when needed means you’ll be able to handle unexpected surges in sales. If you’re unable to keep up with larger or more frequent orders, you could be convincing people to shop with your competitors instead.

Stay efficient during growth

If you managed to double your sales this year, would your business be able to keep up? If you’ve taken steps to making your business scalable, you’ll be prepared for growth and won’t have to struggle to keep up with your own success.

ladyTips for Scaling Your Embroidery Business:


Don’t let your embroidery business be held back. Make sure multiple parts of your business are scalable, including production capacity, customer service, and marketing.

Consider your plans and goals for your embroidery business, and decide what you would need to do in order to meet those goals. This will help you decide where to place your priorities when scaling your business.

Things change, and your plans for growing and scaling your embroidery business today might not match your future goals. Take time at least once or twice per year to review your progress and re-evaluate your plans and processes whenever necessary.


Market Down Embroidery Pricing

The “Market Down” approach to embroidery pricing is really a way to project how much profit your business will generate, and how to price your work, by uncovering what the market price is as opposed to what your cost is.

3d-Puff-cap

After all, the customer is not buying thread from you, or machine time, or paying your rent. The customer is buying the end result, and is probably completely unaware of how much material and time goes into it.

If the design or the colors or the quality of the embroidery makes the buyer feel good about owning the product, he buys it. The purchase could be a practical buy or an impulse buy. Either way the buyer purchased the garment based upon perception, or how it made him feel, not how much it cost you to produce!

How we price our products should reflect this phenomenon. If we have developed a series of clever or beautiful designs that may appeal to a certain market, we can demand a higher price based on the popularity of those designs. The consumer is always looking for new, clever and creative ideas to embellish his wearable products. Here is where creativity can be rewarded.

If you produce amazing quality work, even simple logos, and the customer loves the result, or if you can fill his/her order especially quickly, or even if the customer just enjoys doing business with you and your company – it’s worth more!

There is another side to perceived value. There has been some controversy in our industry for some time now about how we price. Do we price the embroidery and garment separately or as a single package price? From a profitability standpoint, it doesn’t matter how you price the product as long as you include an appropriate profit for both entities.

You can sell the garment with a higher markup and include the sewing for free, or you can charge a lower markup for the garment and add an appropriate charge for the embroidery. Either way, the customer pays the same total price, and you make the same profit.

The difference comes in the perception of the value of the embroidery. Simply put, embroidery adds value to a garment. When you sell a blank garment, there is a reasonable price that you can charge for that garment. When it is embellished, on the other hand, the value of the garment may double; triple or even quadruple due solely to the addition of the embellishment from your single head embroidery machine, digitizing software and your imagination. Ironically, the cost of the embellishment is often less than the cost of the garment and yet the embellishment can add value far beyond the cost of both.

When sewing and digitizing is included in the price of the end product, or when the digitizing is included in the price we create the perception that design and digitizing have no value. We condition the consumer to buy the garment and expect the embroidery for free. No matter whether it is a simple left-chest design or a full jacket back with both front-chest designs, we condition the customer to expect either for the same low price.

As you can see, pricing does not have to be a difficult process. It may take a little bit of time to calculate your costs, but the process is not difficult. Once your prices have been established,  and you have published your price list, constantly check to see that you are using the most proficient and effective tools and methods to do your work. This will contribute to lower prices and higher profit margins.

Our goal at Stitch It International, whether you’re buying an SWF Embroidery Machine or just trying to improve your existing embroidery business, is to provide you with the information you need to succeed! Please sign  up for our newsletter at the bottom of the page for more great information,  specials and business tips from your SWF Embroidery Machine dealer of choice!

Other Things To Consider – Home Embroidery Business Expenses

When you operate out of your home, do not omit the cost of rent. If you do, your total costs figure will be too low. This not only will pass along an unrealistically low price to your customer, but it also will lock you into working in your home permanently. If you someday hope to move your business into a commercial location, your prices should reflect that cost of doing business as well. When figuring a fair rent price, use a “replacement rule” value. This is the real cost to rent comparable space in a commercial location.

Embroidery Pricing Tips

Your actual selling price is established by considering all four of the above items. As you develop your pricing structure, consider the following techniques to make pricing easier:

Build a price sheet to establish credibility in your pricing. A published price sheet establishes credibility on pricing with your customers, so they don’t think you’re making up prices on the spot. Customers are less likely to negotiate with published prices than those quoted verbally off the top of your head. And it makes customers feel like they’re really getting a deal if you discount from there.

Deliver the price with confidence. How you deliver a price also can convey fairness in your prices. Making eye contact when delivering a price to your customer, and speaking clearly, conveys your confidence in your pricing structure. Likewise, avoiding eye contact and mumbling a price can convey uncertainty and invite unwanted haggling.

Offer options, not just one price. If a customer is not happy with a quoted price, offer options that compromise the amount of work to be performed rather than discount prices and reduce your profit margin. For example, suggest doing the embroidery with fewer stitches by shrinking the size or removing background colors before you drop your price.

Do not leave the price at the end of a sentence. The price should never be the focal point of any transaction.  One common technique that removes the focus from price is where you put the price number in your conversation.

Don’t say, “This item will only cost you $50.” Instead, say something like this: “This item will only cost you $50, it comes in two colors, and we can have it ready for you on Thursday.” You could also say, “This item will only cost you $50. Would you like it in navy or ash?” Either way, the emphasis is off price and placed on other terms involved in the sale.

Discounting and sales are tools to be used sparingly. Selling at cost and offering “loss leaders” are effective only if used on a short-term basis to attract attention. Use these techniques correctly to sell other products along with the sale items. This can attract first-time buyers, as well as revive some lost customers.

How to Price Embroidery Work

SafetyOf all of the skills necessary to start and grow any embroidery business, the one that most people have trouble with is establishing the right pricing for their embroidery services. What is it about pricing that puts fear and sometimes panic into the hearts and minds of most small business owners and entrepreneurs? Here are some common answers to that question:

  • If I charge too much I won’t get any business
  • If I charge too much my main competitor will take my customers
  • If I don’t charge enough I won’t make any money
  • I’ll never be able to raise pricing on embroidery products, there’s too much competition
  • It’s embarrassing to ask for money

But most of the time, it’s just a lack of knowledge about pricing or lack of direct experience in figuring prices that foster these feelings.
Whatever the reason, pricing your product is not that difficult and should not cause anxiety. To the contrary, prices can be figured in a simple fashion and delivered with ease and confidence. Let’s explore some of the mechanics involved in determining a selling price as well as some techniques used by professionals to quote prices without anxiety.

There are many ways to develop pricing and several standard models to choose from, but fundamentally, businesses price their products in just one of 2 ways that we will call Cost Plus and Market Down.
When you stop to think about it, a selling price is a somewhat arbitrary number. It does, however, reflect several key items such as the costs associated with doing business, a desired profit margin, the perceived value of your product and your competitor’s selling price. By looking at each of these items, we can show you how to both conceptually and practically set a selling price for your work.

Cost Plus Pricing Method

One of the most fundamental business rules states that selling price is the sum of the cost of doing business plus a profit margin. This rule (Price = Cost + Profit) implies that in order to establish a price, we have to know the cost of doing business. Costing your work is not as difficult as it sounds.

You do this by simply totaling all of your business expenses, such as rent, machine lease payments (or depreciation if purchased), labor costs (include matching F.I.C.A., workman’s compensation and unemployment insurance contributions), raw material costs, phone, postage, office supplies, etc.

Do not include garment costs in this total since we are only figuring supply costs at this time. Garment costs can be marked up separately and added to the derived selling prices. Next, divide this total cost figure (less garments) by the number of hours contained in the time period you used to calculate your costs. For instance, if you totaled costs on an annual basis, divide this total by the number of work hours in a year — 40 hrs. x 52 weeks = 2,080 hours.

If you are a startup business and you do all of the production yourself, you should still allocate a direct labor cost— even if you do not receive a regular paycheck. It is important to build this into your operating cost so that your selling price reflects labor expense. As you grow the business and add employees, the labor cost calculations will increase appropriately, adding revenue to cover the additional outlays while still maintaining a profitable margin in your pricing.

After you have added all your costs and divided this total by the hours worked, you now have a cost of doing business per hour. For example, if you operate one single head machine and annual costs total $41,600, you should divide that by 2,080 hours per year, and you see that your cost per hour is $20.

HOW DO I DETERMINE MY COSTS PER UNIT?

The next step is to translate this figure into a cost per unit. First you have to select a unit of measure that best represents the cost and effort invested. One of the easiest and most common units to use is stitch count, since stitches measure output in an accurate fashion.

hats

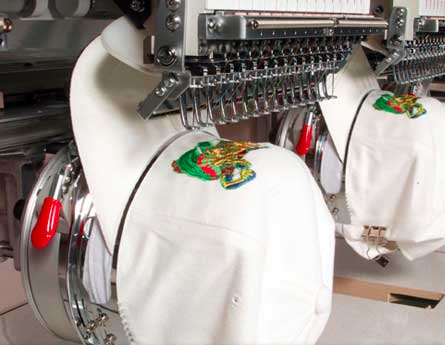
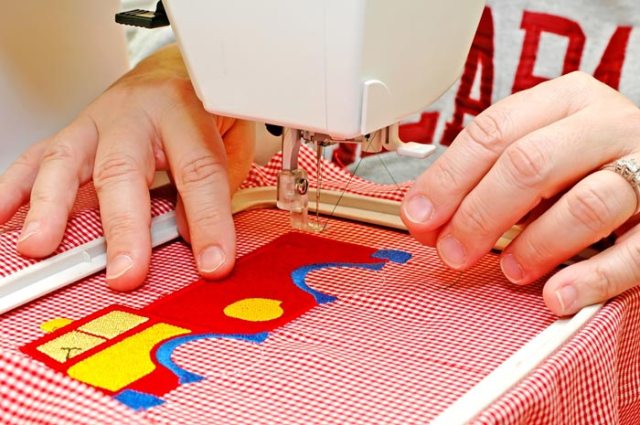
If we use a single head machine , the SWF 1501C is by far the most popular single head for small businesses, it should produce anywhere from 18,000 to 30,000 stitches per hour (300 to 500 stitches per minute).

Using the cost figure calculated above, our cost per thousand stitches could range anywhere from $0.67 to $1.11, depending upon your own unique stitching output.

Sewing at 30,000 stitches per hour produces units at $0.67 per hour, while a machine sewing at 18,000 stitches per hour produces units at $1.11 per hour. So you would ADD this to the $20/hour cost of running your business in the example we used above and arrive at your real cost per unit.

COST PLUS EMBROIDERY BUSINESS PRICING MODEL

Profit margin is the additional money added to the unit cost in order to make a profit. If you are a one-person shop operating one single head embroidery machine,  or multi head embroidery machine for that matter, this is the growth money earned for running your business above the hourly wage calculated in your operating cost figure.

baby-cap

Remember, you are starting or running an embroidery BUSINESS, so the profit of that business is the difference between working for hourly wage and creating a business that will grow.

This COST PLUS method starts with how much profit you want to make and working backwards to figure out what you need to charge to get there.

The amount of profit that you add to the cost base can be calculated by first setting a target dollar that you wish to earn in your business per year. If you divide that figure by the capacity of your equipment, you can then amortize the profit over your production target.

For example, if you want to clear $60,000  using a  single head machine, divide that by the number of working hours in a year (2,080) and divide that number by your machine’s average stitch capacity to determine the per-unit margin you would have to add to your selling price.

If we divide $60,000 by 2,080, and then divide that by 18,000 stitches per hour, we come up with a figure of $1.60. Since we know our cost per unit in our example at 18,000 stitches per hour is $1.11, we have to get an average unit price of $2.71 ($1.11 + $1.60) to generate a profit margin of $60,000 for a year.

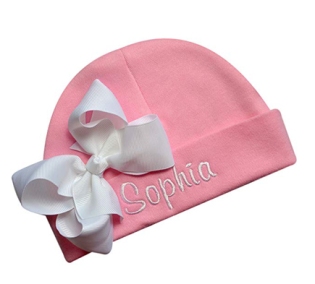
This selling price could work. Many embroiderers sell (and mark up) the garment as well in order to keep the price per stitch down while still realizing a sizable margin off the finished product. The garment could be 30% of your profit or markup on the entire project, depending on the size of the order.

So now your calculations could include the cost of the garment and what profits you might make on that as well.

You can maximize every opportunity by offering more than one decorating method. This will not only expand your potential customer base, but add some real profitability to your start up embroidery business.

embroidered drawing